
How to integrate OneSignal in react-native
OneSignal is a high volume and reliable push notification service for websites and mobile applications. We support all major native and mobile platforms by providing dedicated SDKs for each platform, a RESTful server API, and an online dashboard for marketers to design and send push notifications.
In this artical I'm going to explain how to integrate OneSignal in react-native, for android platform.
Requirement For Setup
- A OneSignal Account.
- Firebase project Server Key and Sender ID
- Your OneSignal App ID, avaliable in OneSignal app setting.
Setup and Integration
- Create firebase project
- Create OneSignal app
- Integrate OneSignal SDK in react-native
I'm going to provide detail information on each step.
1. Create firebase project
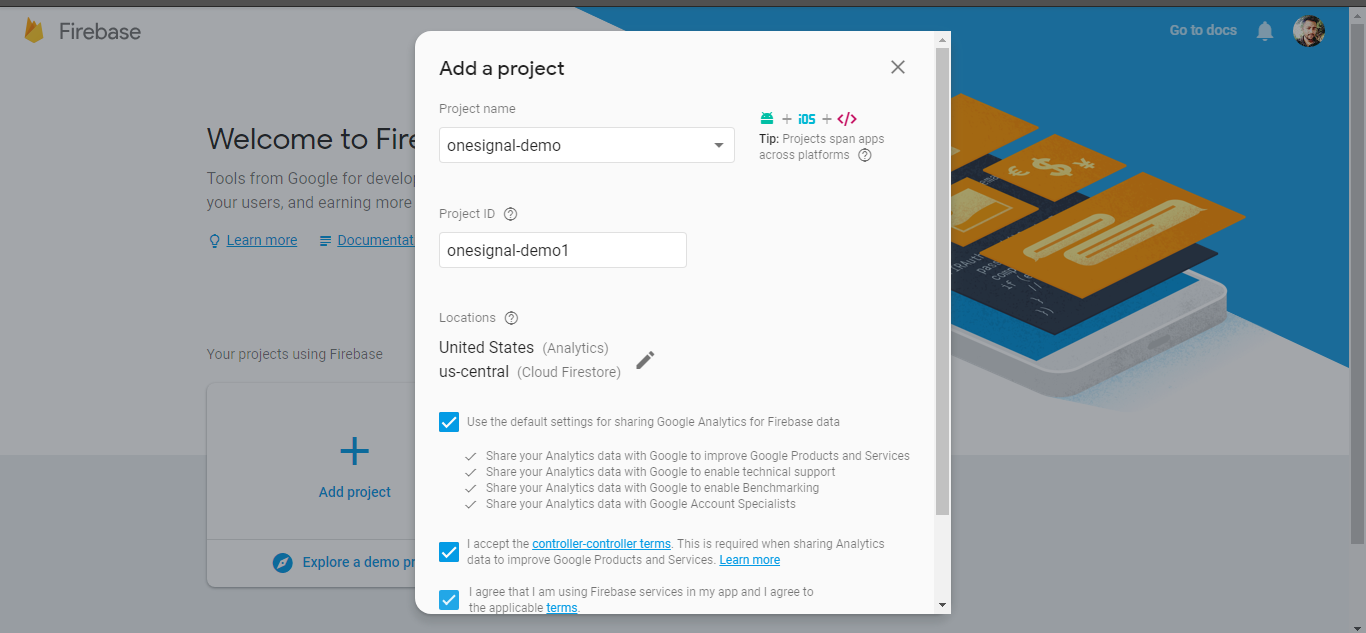
To send push notification on android app throught OneSignal we need to have firebase project Server Key and Sender ID. So first we need to create firebase project.
screenshots of firebase console
- Add Poject
- In created project go to project setting where you will get
Server KeyandSender ID
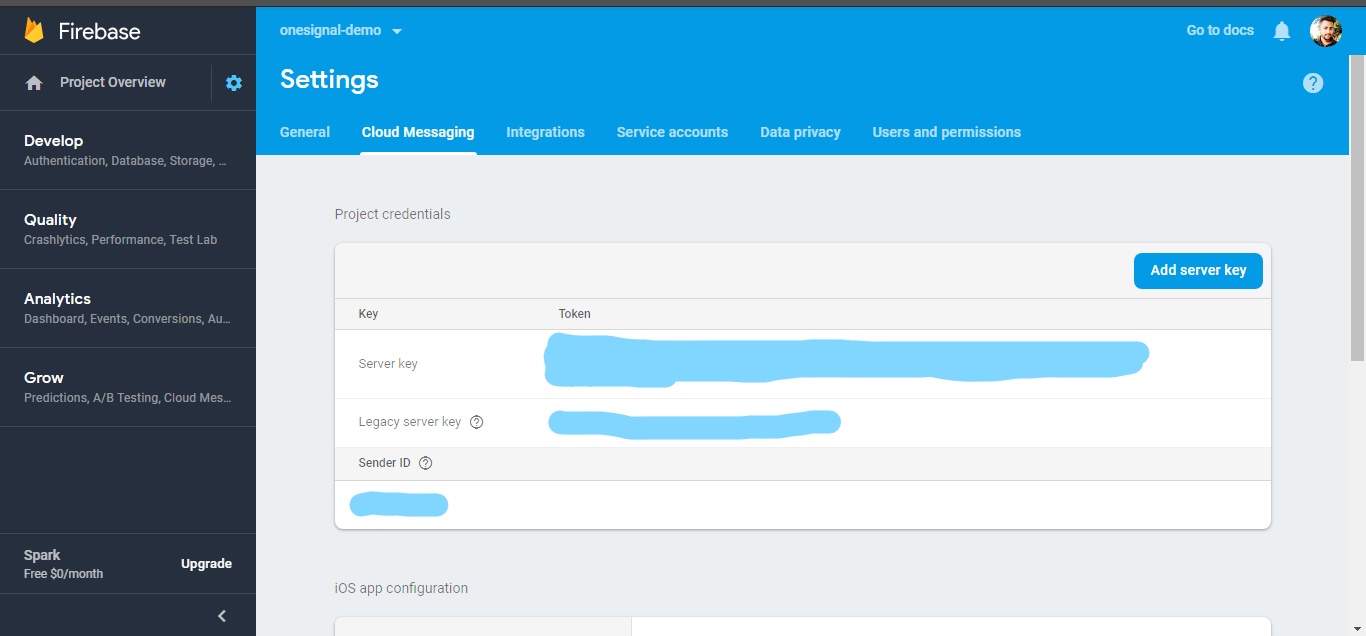
Now we have
Server KeyandSender IDnow we can create OneSignal app and configure it for android platform.
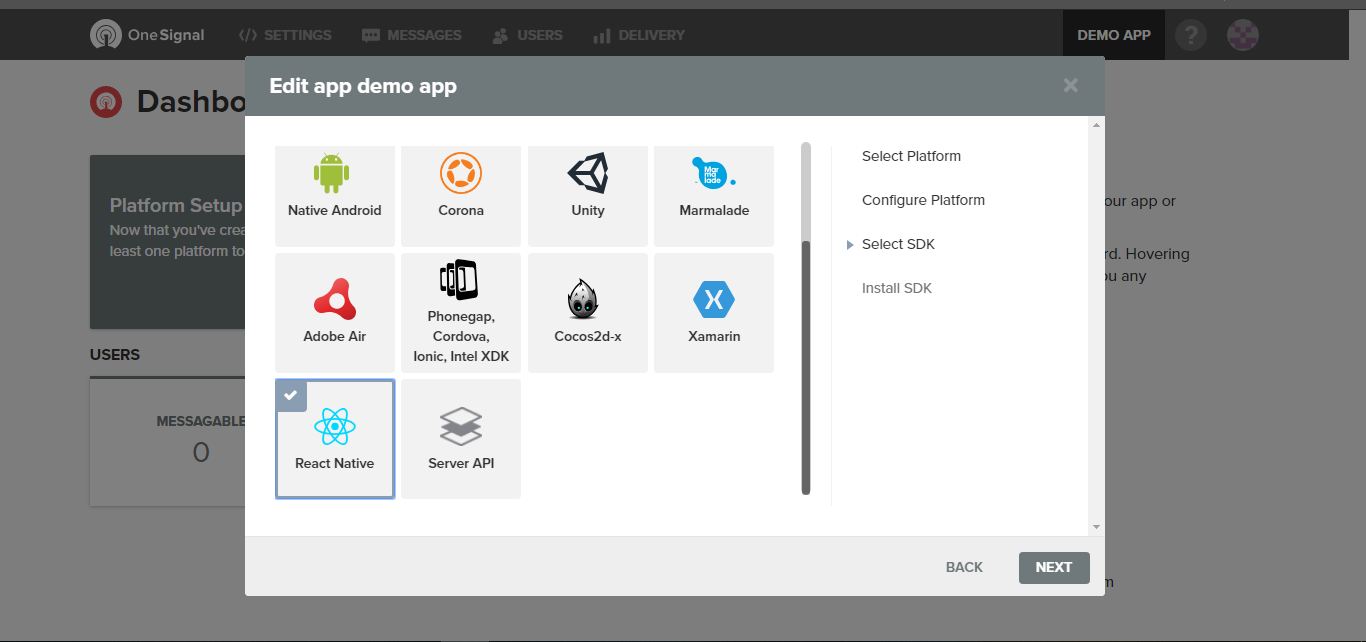
2. Create OneSignal App
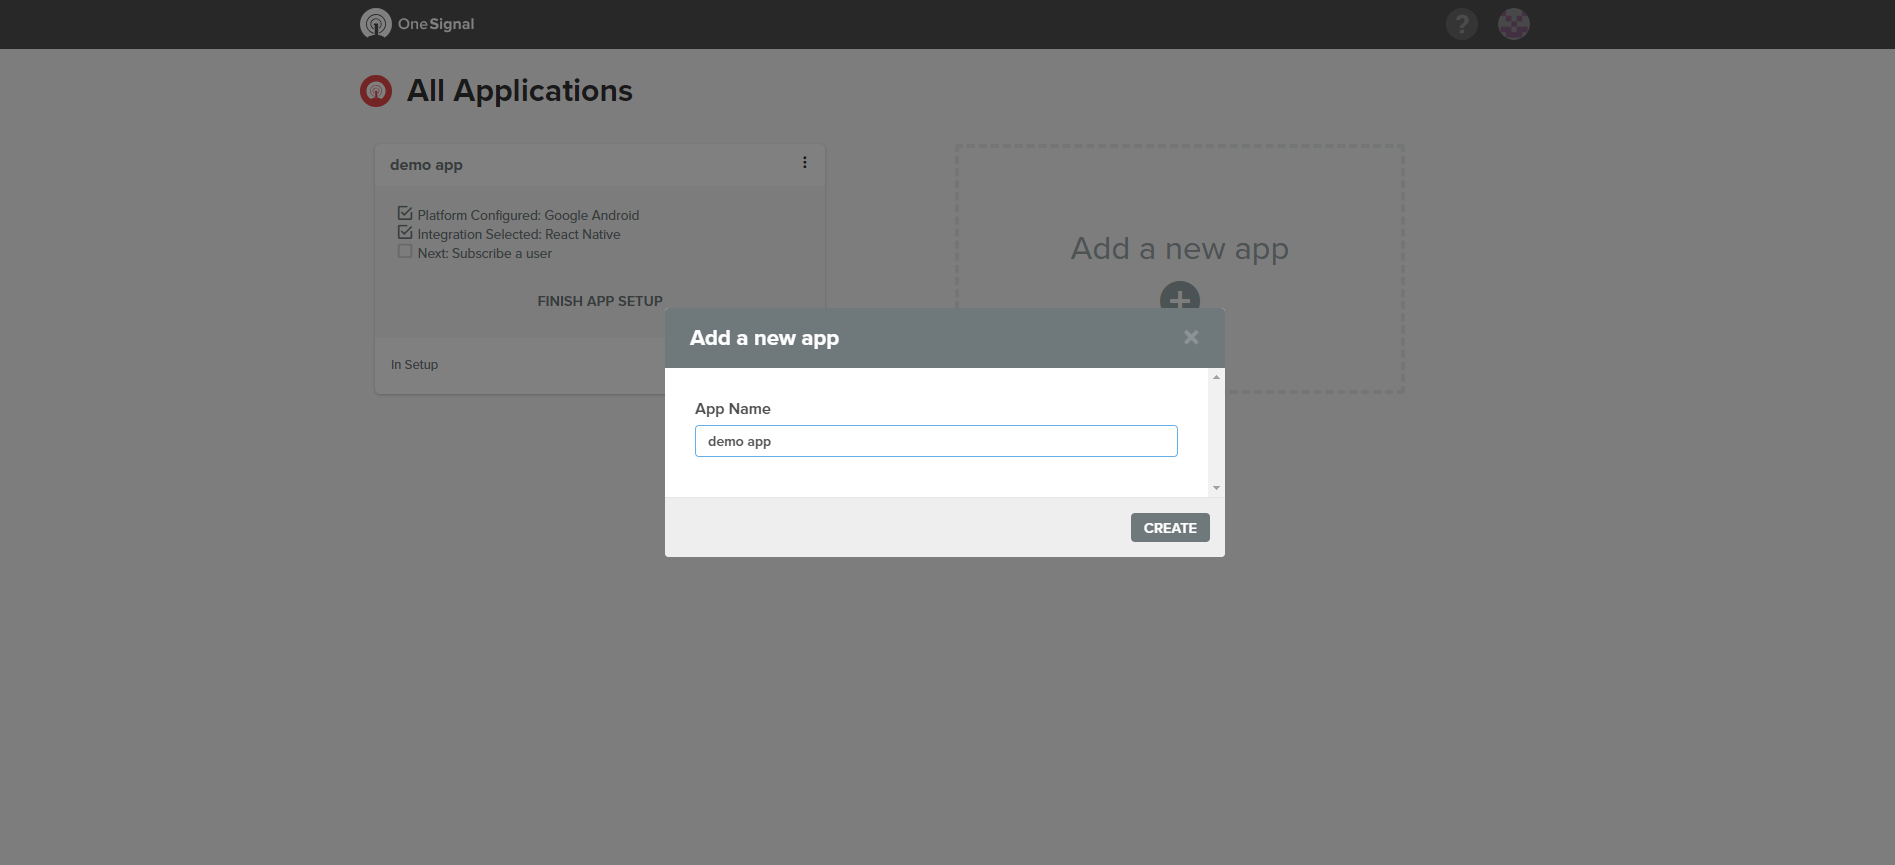
- Select Platform (Here we create for android)
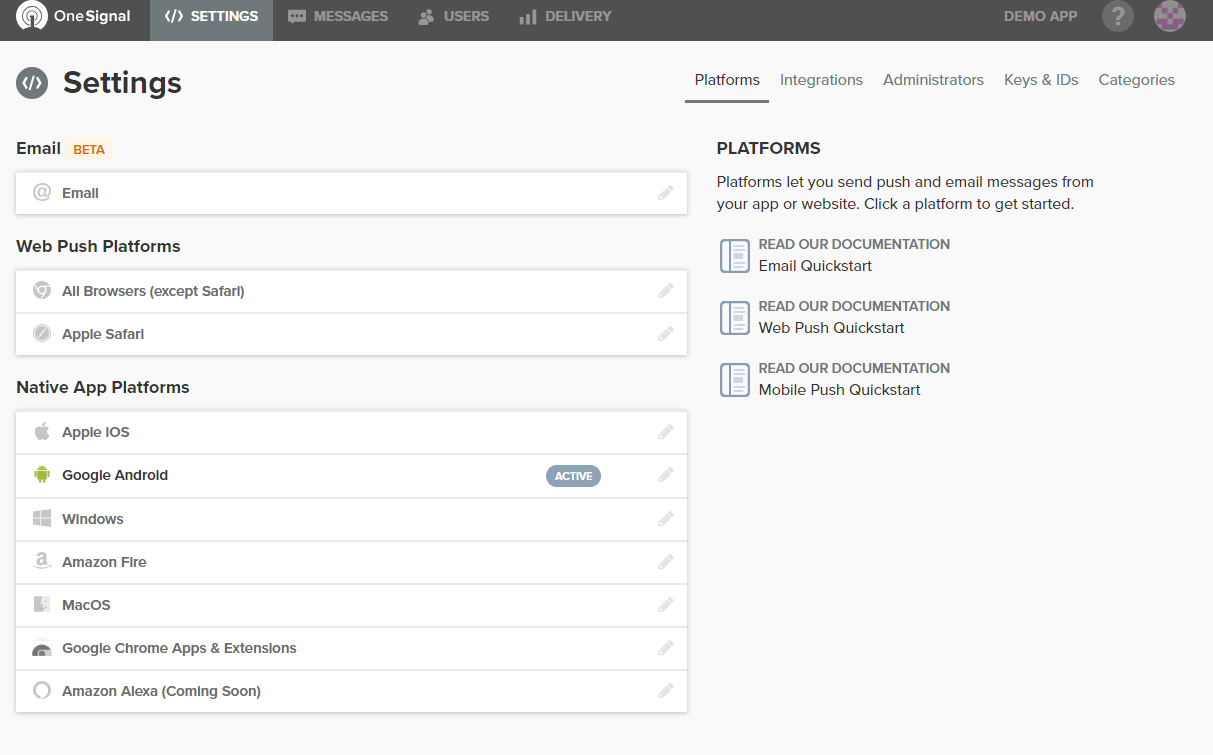
- put here
Server KeyandSender IDand configure platform
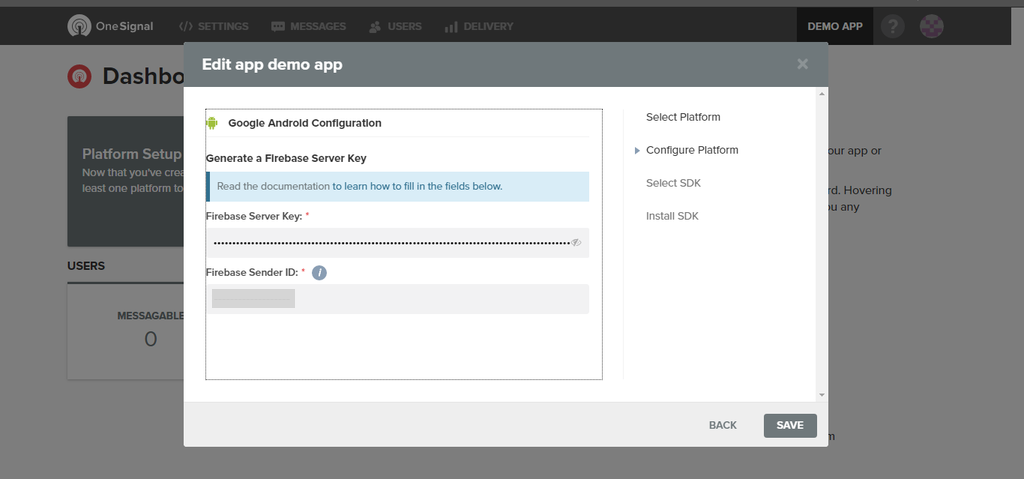
- Finally you will get your OneSignal App ID
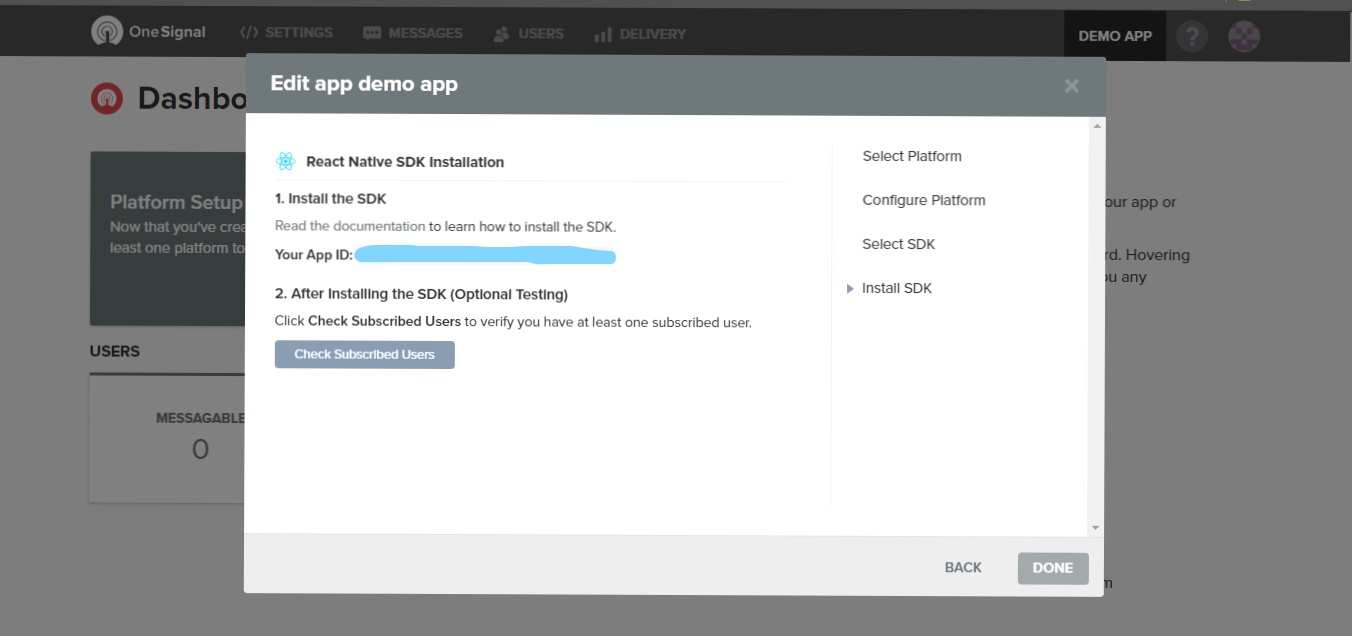
3.Integrate OneSignal SDK in react-native
- Add library to project
yarn add react-native-onesignal
            OR
npm install --save react-native-onesignal
- Link library to project
react-native link react-native-onesignal
In your AndroidManifest.xml, add android:launchMode="singleTop" as an attribute to your main activity. You can also set location permissions.
<manifest xmlns:android="http://schemas.android.com/apk/res/android"
    package="com.onesignalexample.demoApp"
    android:versionCode="1"
    android:versionName="1.0">

    <uses-permission android:name="android.permission.INTERNET" />
    <uses-permission android:name="android.permission.SYSTEM_ALERT_WINDOW"/>
    <uses-permission android:name="android.permission.ACCESS_NETWORK_STATE"/>
    <uses-permission android:name="android.permission.ACCESS_COARSE_LOCATION"/>
    <uses-permission android:name="android.permission.ACCESS_FINE_LOCATION"/>
    <uses-permission android:name="android.permission.CAMERA" />

    <uses-sdk
        android:minSdkVersion="16"
        android:targetSdkVersion="22" />

    <application
      android:name=".MainApplication"
      android:allowBackup="true"
      android:label="@string/app_name"
      android:icon="@drawable/icon"
      android:theme="@style/AppTheme"
      android:launchMode="singleTop">

      <activity
        android:name=".MainActivity"
        android:label="@string/app_name"           android:configChanges="keyboard|keyboardHidden|orientation|screenSize"
        android:windowSoftInputMode="adjustPan">
        <intent-filter>
            <action android:name="android.intent.action.MAIN" />
            <category android:name="android.intent.category.LAUNCHER" />
        </intent-filter>
      </activity>
      <activity android:name="com.facebook.react.devsupport.DevSettingsActivity" />

   </application>

</manifest>
- Add OneSignal App ID in app/build.gradle for android.
.....

android {
    compileSdkVersion 26
    buildToolsVersion "26.0.2"

    dexOptions {
        jumboMode true
    }
    defaultConfig {
        applicationId "com.onesignalexample.demoApp"
        minSdkVersion 21
        targetSdkVersion 26
        versionCode 1
        versionName "1.0"
        ndk { abiFilters "armeabi-v7a", "x86" }
        vectorDrawables.useSupportLibrary = true
        manifestPlaceholders = [
            onesignal_app_id: "#######-######-###-####-######",
            onesignal_google_project_number: "#######"
        ]
   }

.....
For IOS platform will blog in next post..