
Automate site-building tasks with Gatsby Recipes
In the last tutorial we saw how easy it was to set up a blog with the help of gatsby theme. Ok, now you have your blog set up ready, what's next? I want to see how my visitors are interacting? what content do they spend the most time reading on? How many blogs do they read on average? These all questions can be answered when we have some form of analytics trackers added on our blog.
Another new plugin? How many more? I understand that adding a new plugin and customizing them according to our needs is tiring work, so what do we do? Gatsby Recipes to the rescue.
What is Gatsby Recipes?
Gatsby Recipes is a new tool recently introduced by Gatsby to automate common site building tasks.
Recipes are run from the CLI and automate common tasks like creating pages and layouts, installing and setting up plugins, adding a blog to a site, setting up TypeScript, and many more.
It can do so many complex tasks and you have to develop recipes 1 time and then you can use it any time to do the same tasks.
It is now possible to create 1 Recipe to develop a simple website and then you can use it to create many more by running 1 command. To understand how to create a recipe I'll show you how to create a Gatsby Recipes to install google analytics in the Gatsby Site.
Setting up
To Run the Gatsby Recipes you need to have Gatsby-CLI and updated to the latest version as Recipes is a new rapidly developing feature.
npm install -g gatsby-cli@latest
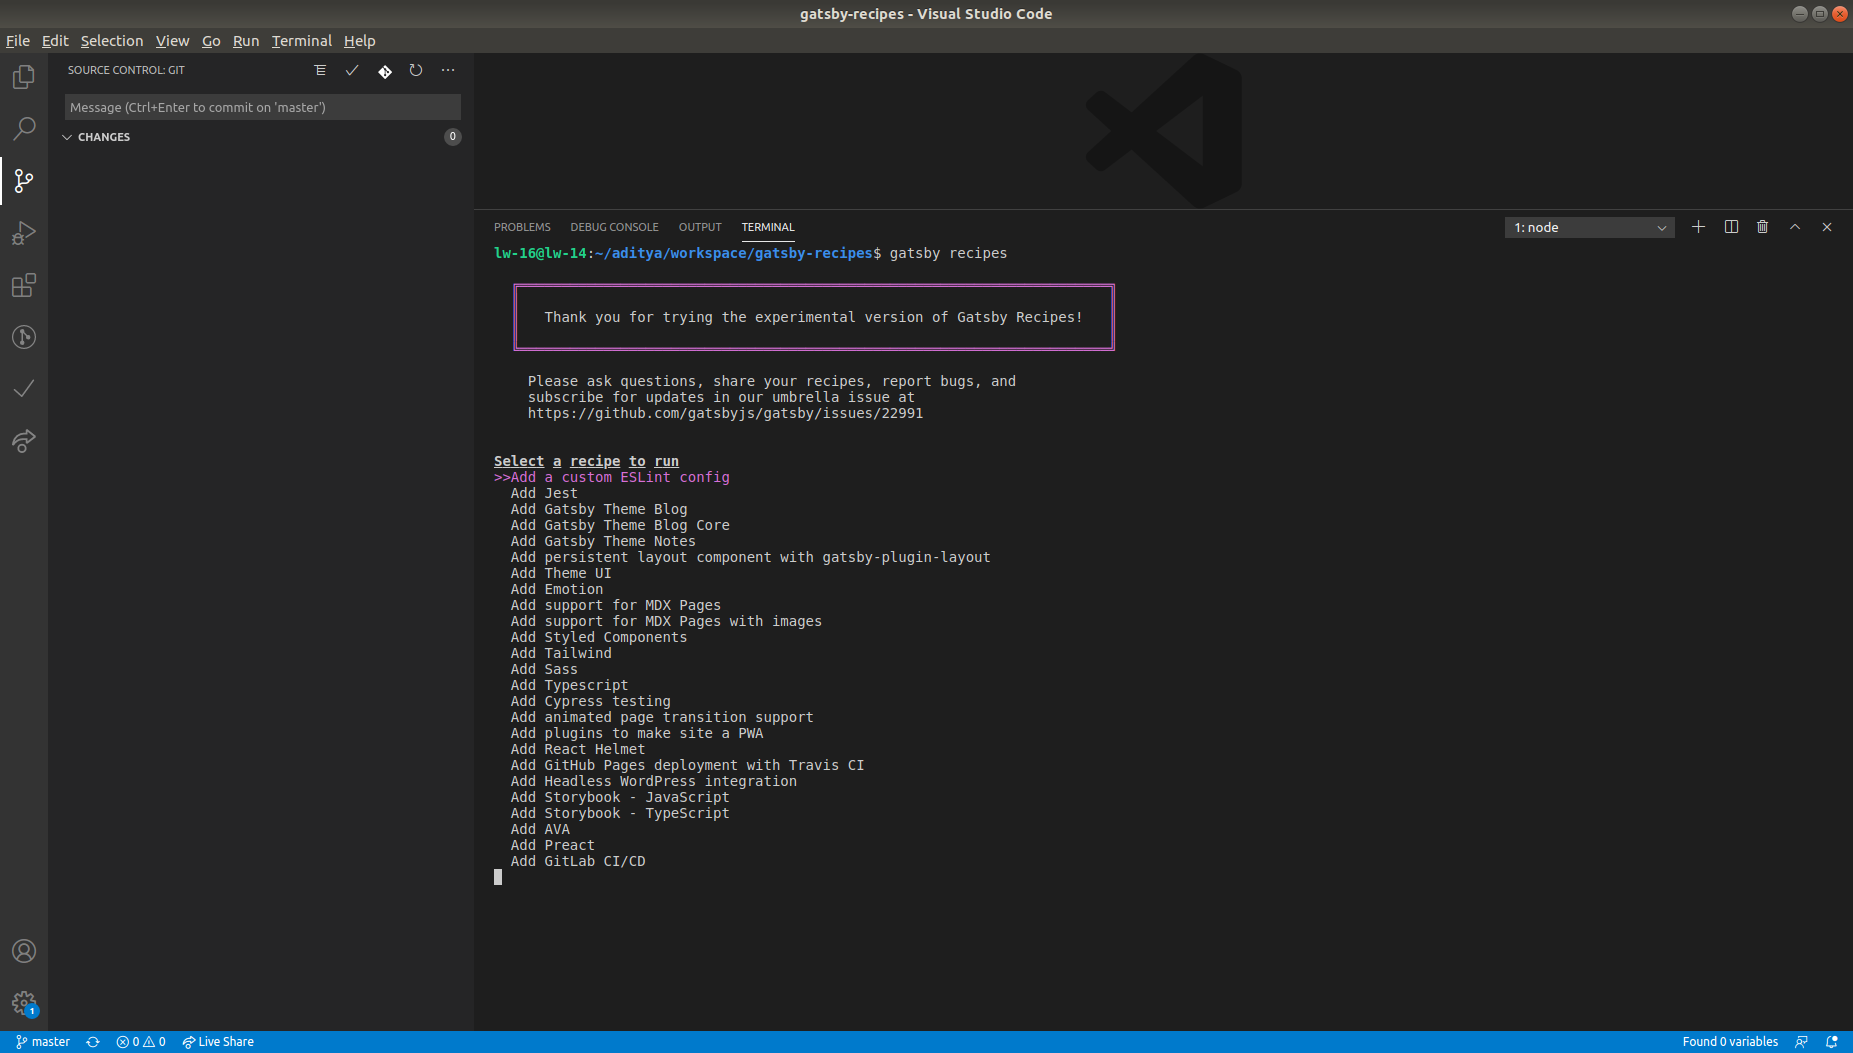
To confirm that it's installed, run gatsby --help in your terminal. The output should show the Recipes command.
You can also try gatsby recipes to check out currently available Recipes to install on your site.
Developing Recipes
Recipes are simple MDX files with which we can easily write what tasks to perform with the help of Recipes API.
Our Recipes for Google Analytics would look something like this.
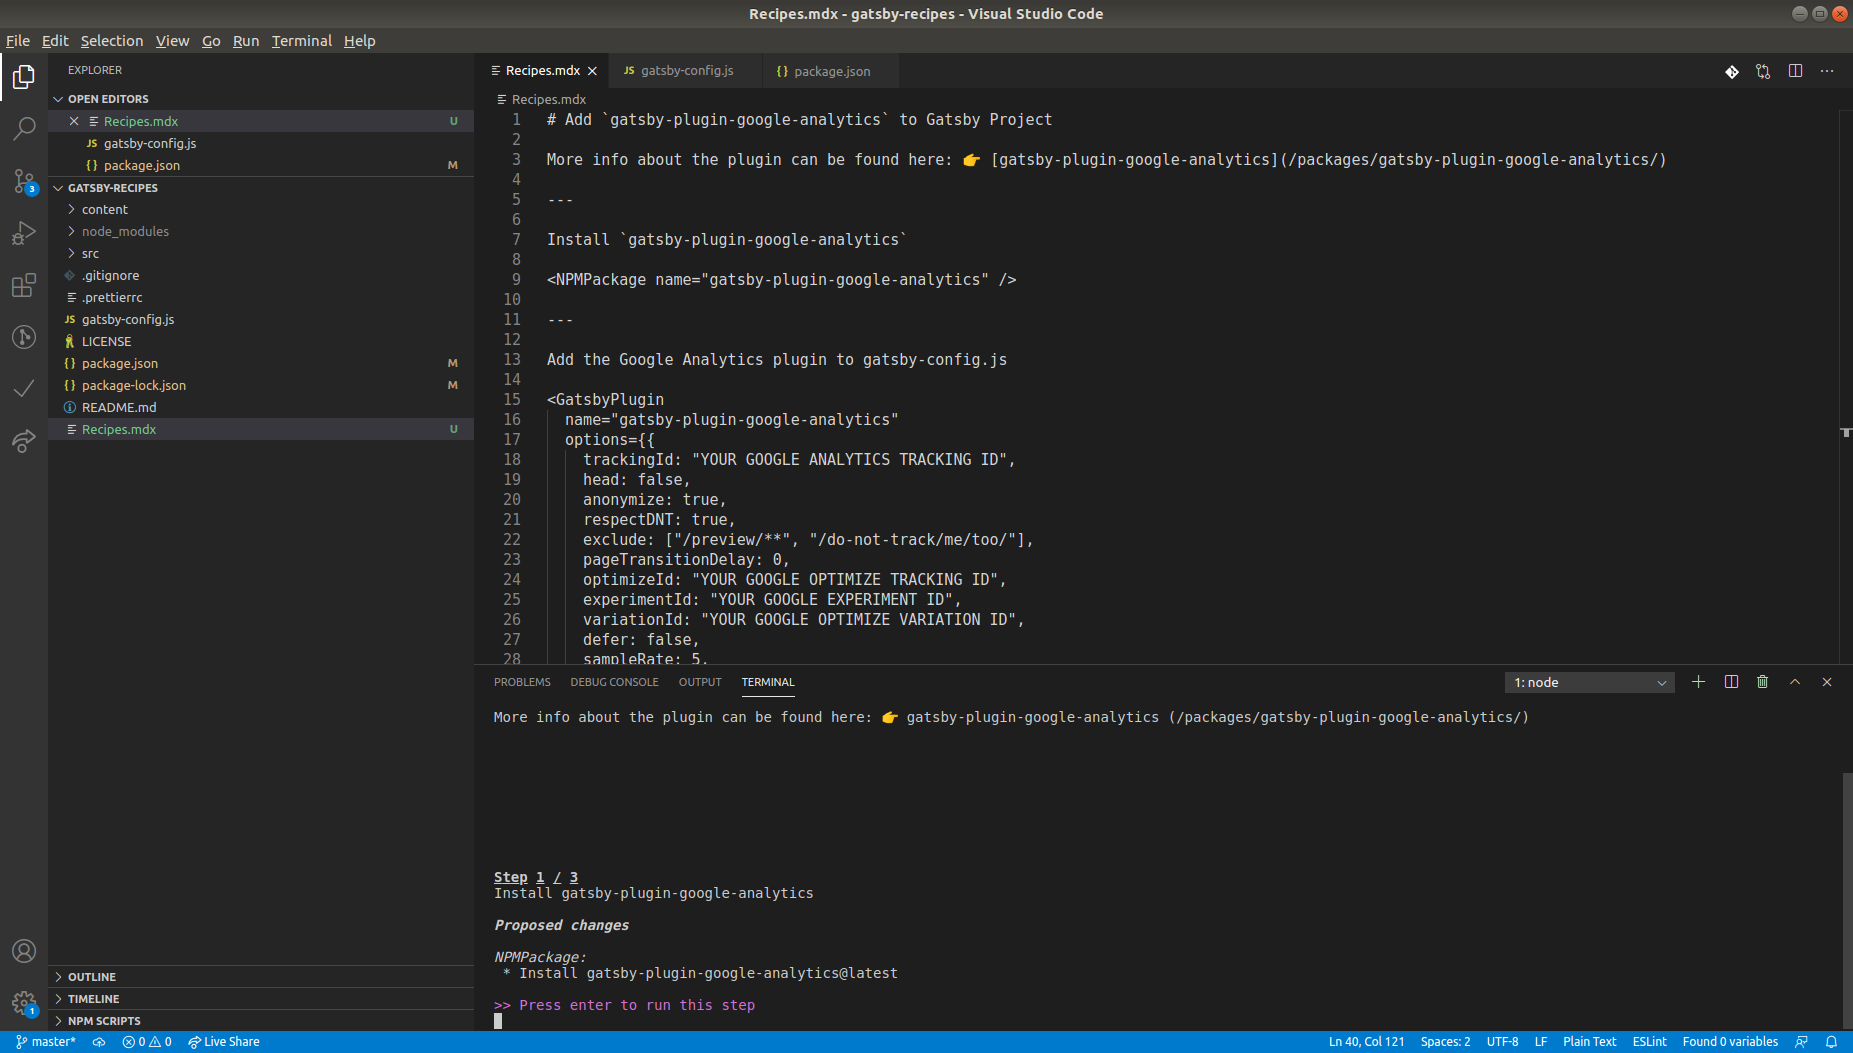
# Add `gatsby-plugin-google-analytics` to Gatsby Project
More info about the plugin can be found here: 👉 [gatsby-plugin-google-analytics](/packages/gatsby-plugin-google-analytics/)
<!-- use three dashes to separate steps of the recipe -->
---
Install `gatsby-plugin-google-analytics`
<NPMPackage name="gatsby-plugin-google-analytics" />
---
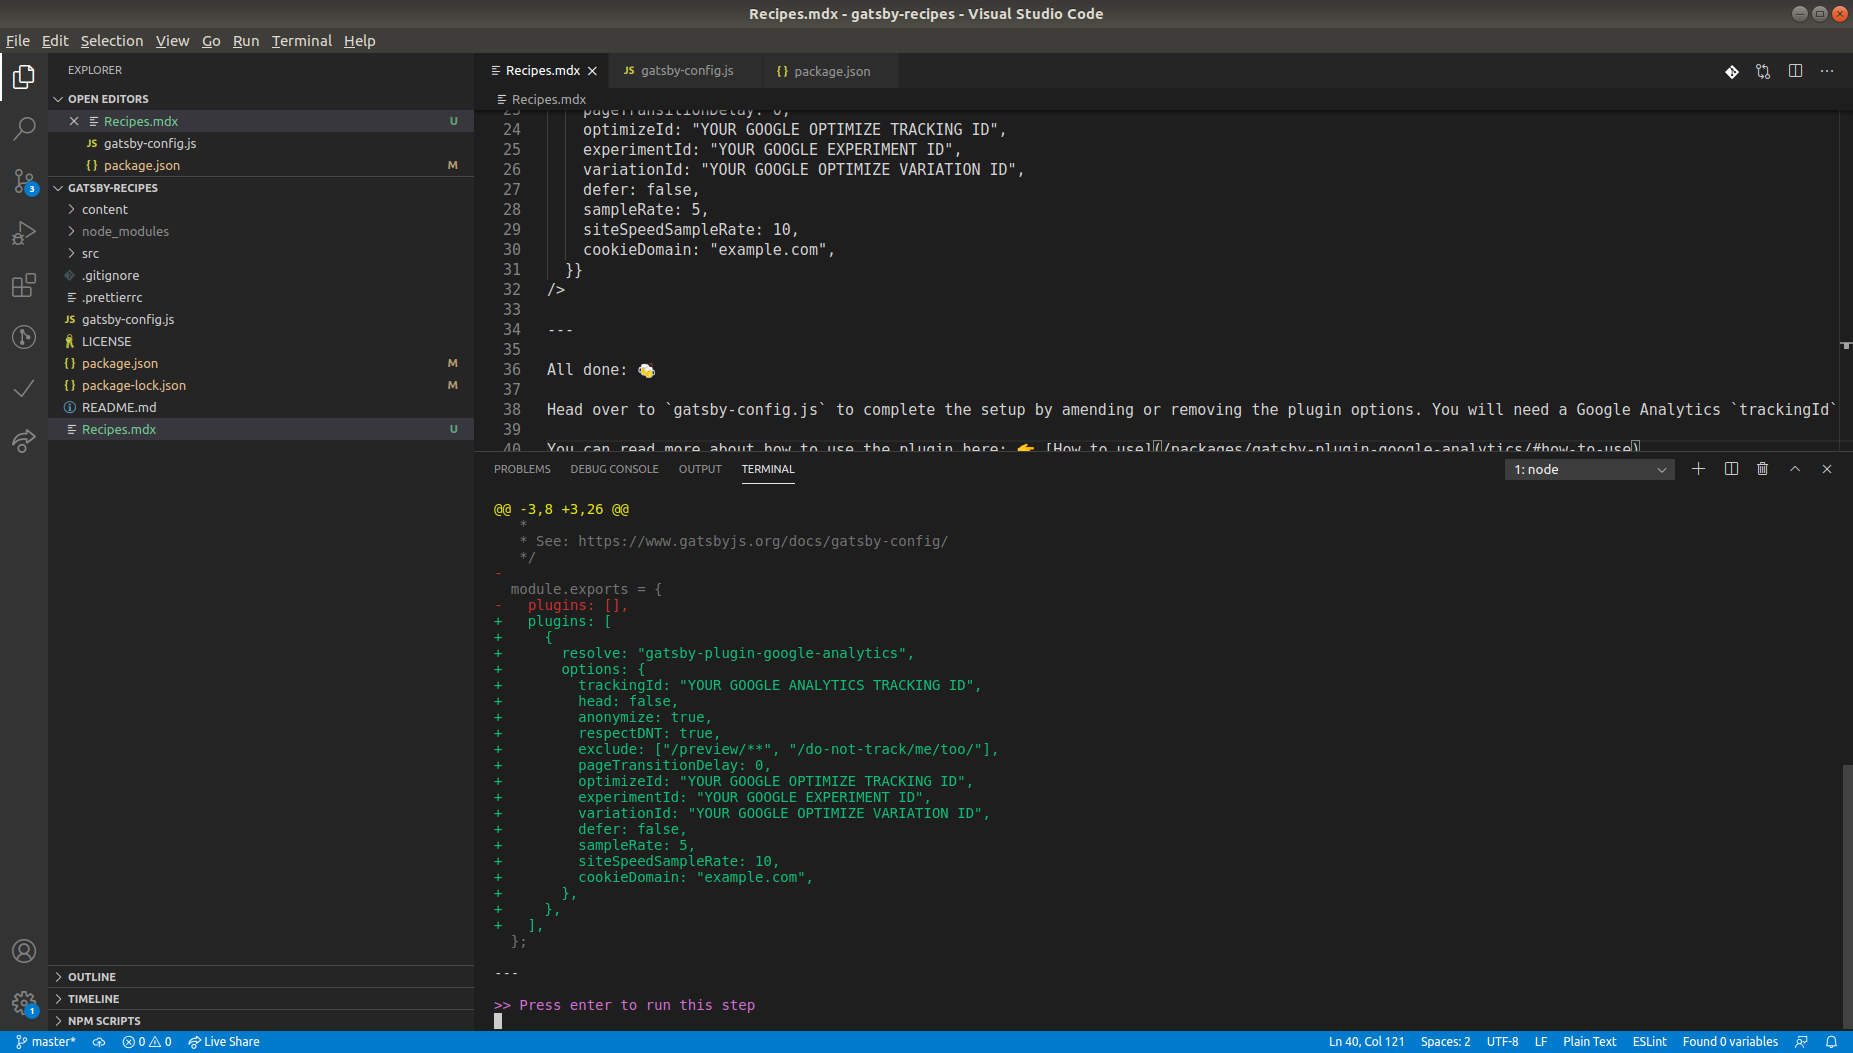
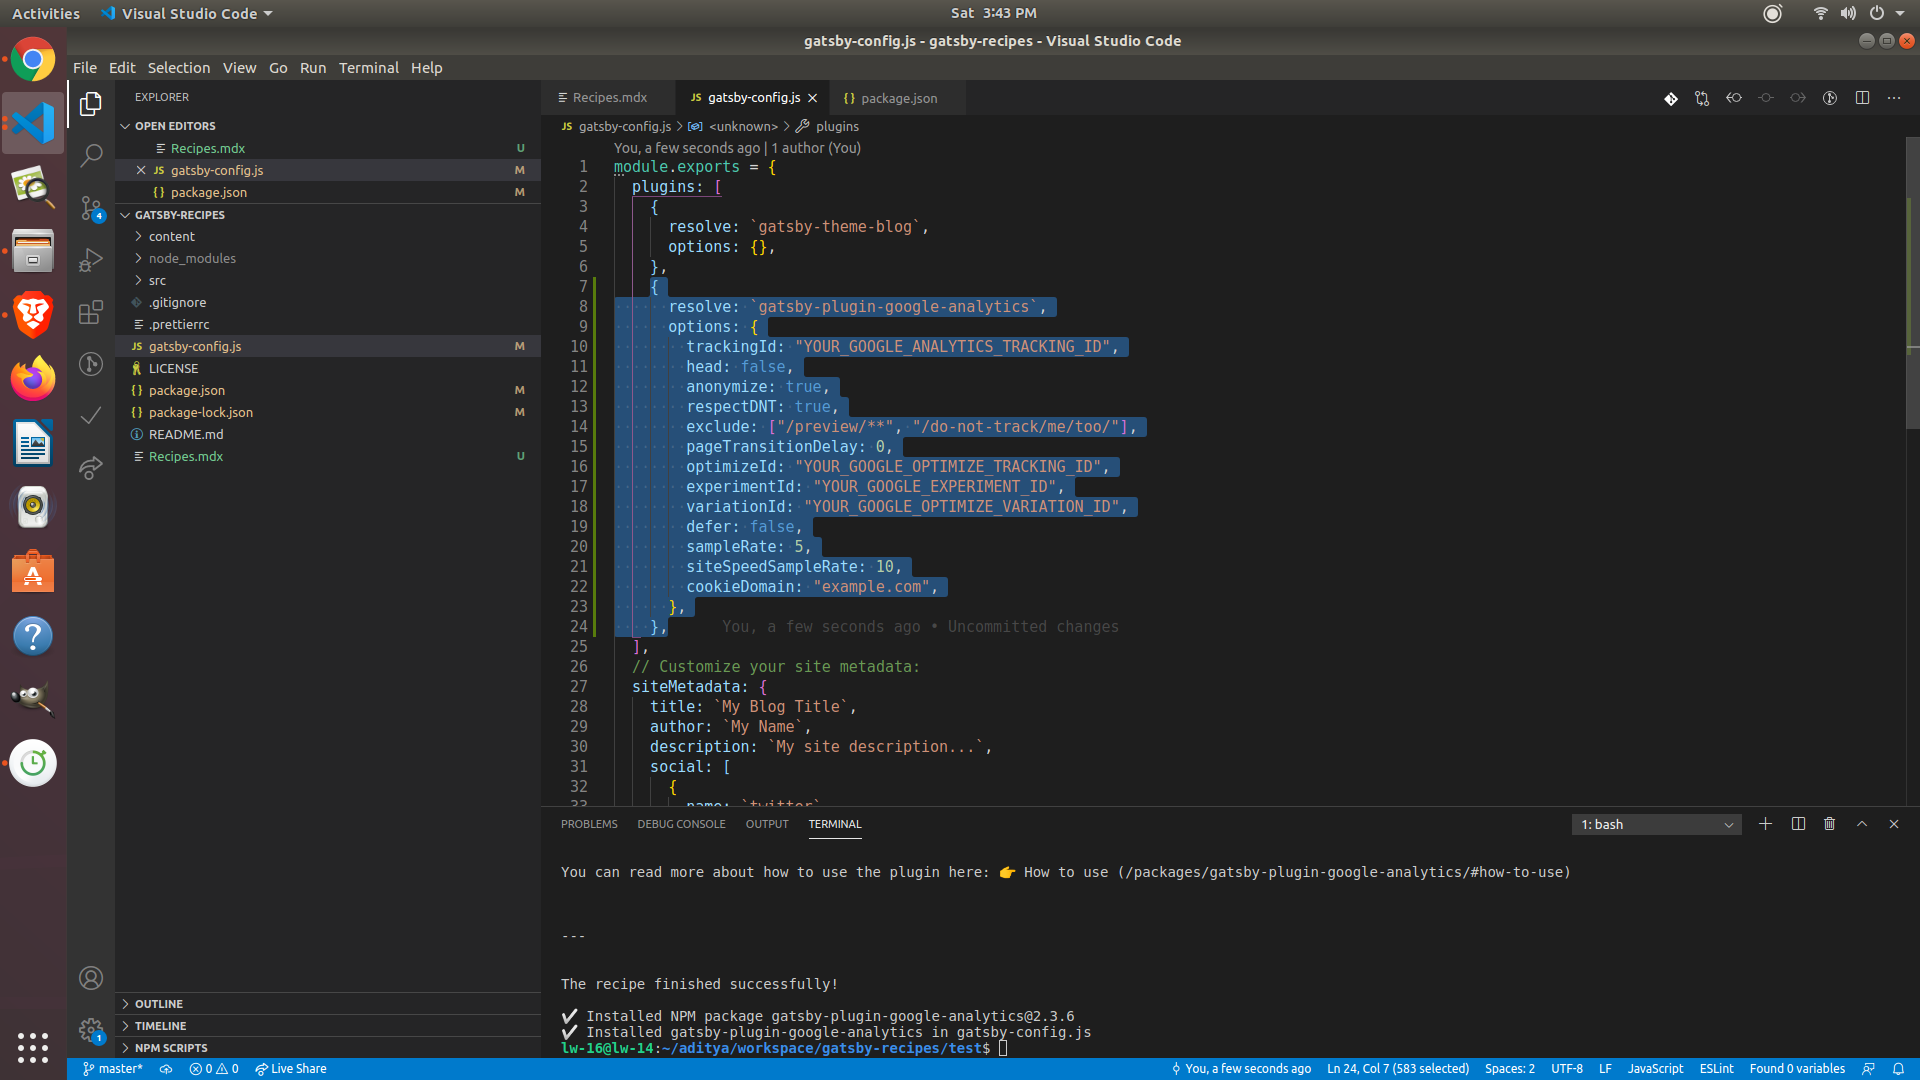
Add the Google Analytics plugin to gatsby-config.js
<GatsbyPlugin
name="gatsby-plugin-google-analytics"
options={{
trackingId: "YOUR GOOGLE ANALYTICS TRACKING ID",
head: false,
anonymize: true,
respectDNT: true,
exclude: ["/preview/**", "/do-not-track/me/too/"],
pageTransitionDelay: 0,
optimizeId: "YOUR GOOGLE OPTIMIZE TRACKING ID",
experimentId: "YOUR GOOGLE EXPERIMENT ID",
variationId: "YOUR GOOGLE OPTIMIZE VARIATION ID",
defer: false,
sampleRate: 5,
siteSpeedSampleRate: 10,
cookieDomain: "example.com",
}}
/>
---
All done: 🍻
Head over to `gatsby-config.js` to complete the setup by amending or removing the plugin options. You will need a Google Analytics `trackingId`
You can read more about how to use the plugin here: 👉 [How to use](/packages/gatsby-plugin-google-analytics/#how-to-use)
How to run recipes
To run a local recipe, make sure to start the path to the recipe with a period like:
gatsby recipes ./my-gatsby-recipe.mdx
To run a remote recipe, copy the path to the recipe and run it e.g.
gatsby recipes https://example.com/gatbsy-recipe.mdx
When you run the recipe you will see something like this:

Then just follow the steps and it will guide you step by step.
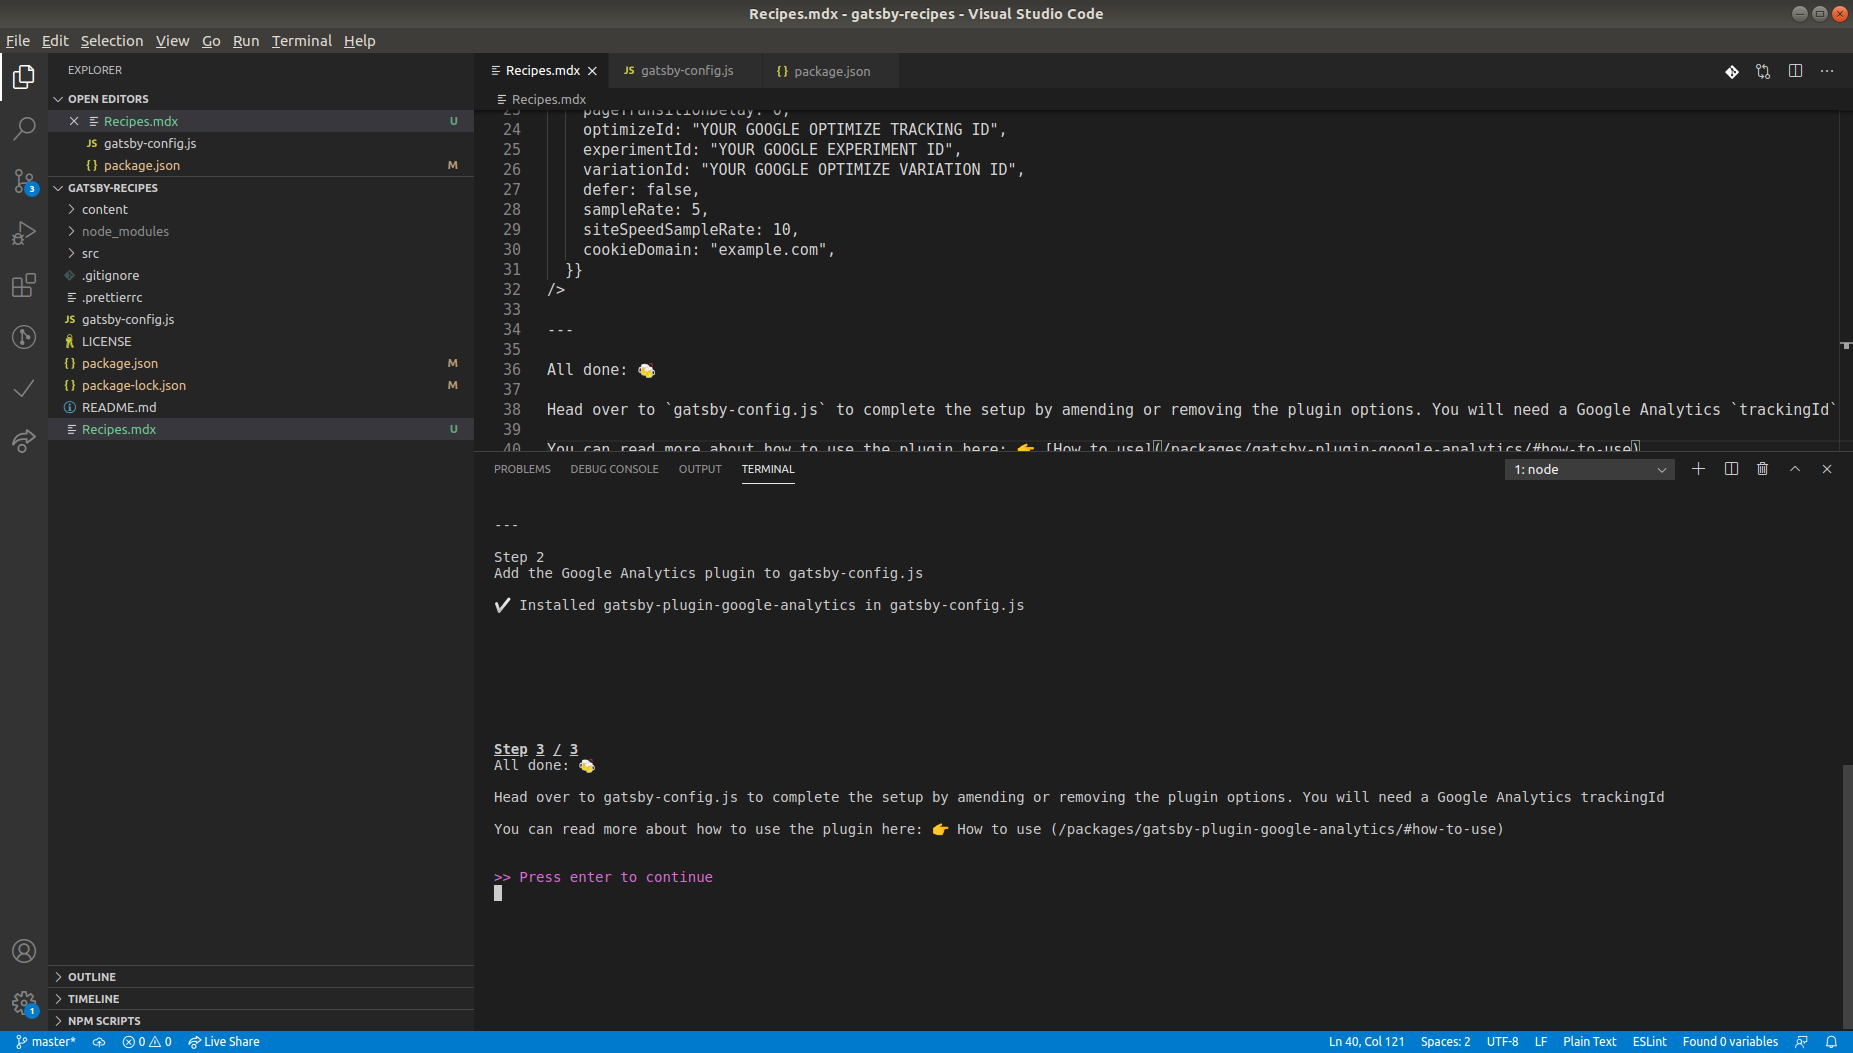
And check gatsby-config.js file to see your plugin added. Now just add the tracking ID and you are set to go.
Conclusion
Now with this recipe developed you can add other plugins that you install in your site and create a Recipe with which you can develop your new site in a matter of seconds. To know more head over to docs.