How to use svg icons in react-native
With this article you will be able to use svg icons in react-native mobile application using react-native-vector-icons.
I had recently published part-2 of svg icon intergration
react-native-vector-icons is popular and high rated library for react-native. Which support some of the famous font family.
We need to follow some steps in order to use svg font in react-native app.
- Generate fonts from svg icons
- Integrate font file in react-native app
- Use integrated font in react-native
We can also use other image file(.png) as icon in react-native app but here in this article i will guide you for svg icons only.
1. Generate fonts from svg icons
To use svg icon in react-native app we need to first generate icons font. We can generate icon fonts online using icon font generator. Here are some of them.
I will show how to generate icon fonts using Icomoon. Fontello has also same proces. After you complete this step with Icomoon, you can easily do it with Fontello as well.
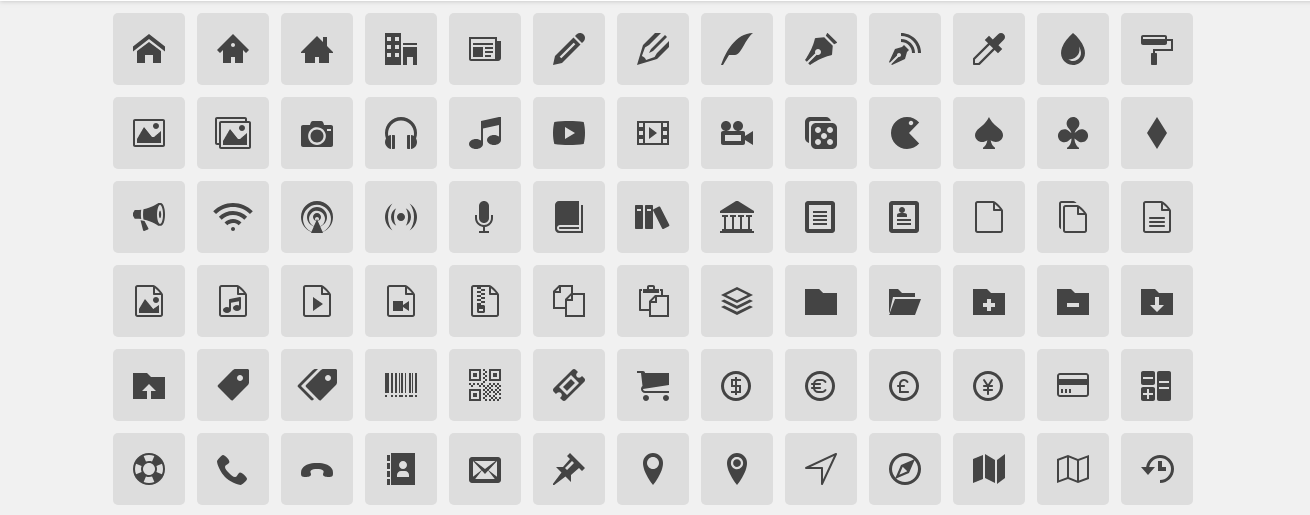
- First of all we need a svg icons to generate icon font. If you have already you can use that. I am downloading svg files from linearicons free version.
You will get zip file from linericons on downloading free font. It will be provide multiple type of fonts, We are going to use svg icons file only.
-
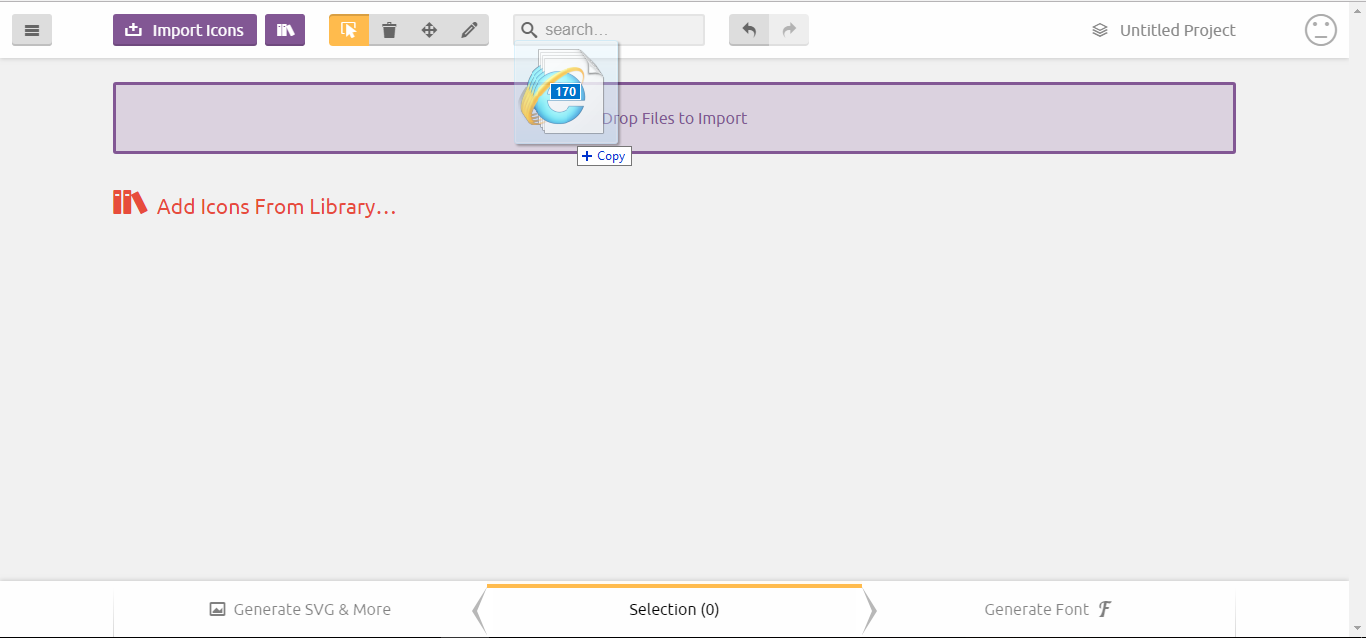
Now goto Icomoon
-
You need to select all the svg from machine and drop to icomoon page
-
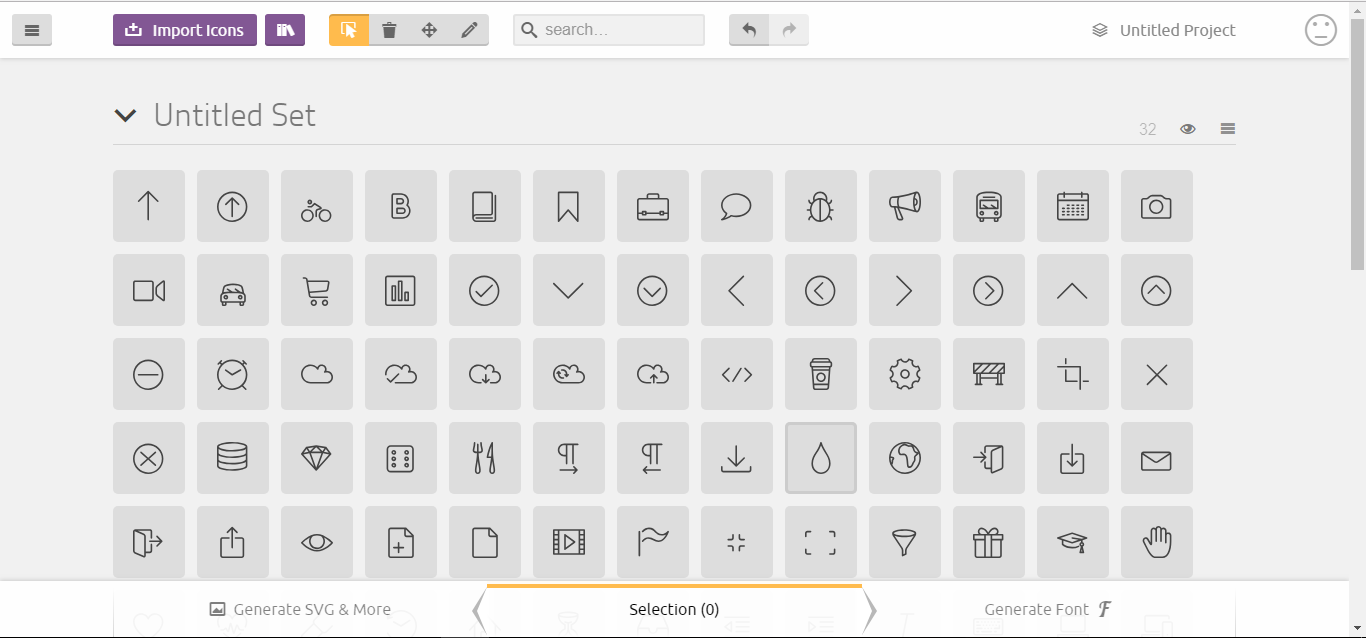
After dropping font it will generate list of icons that you dropped, It should look like:
-
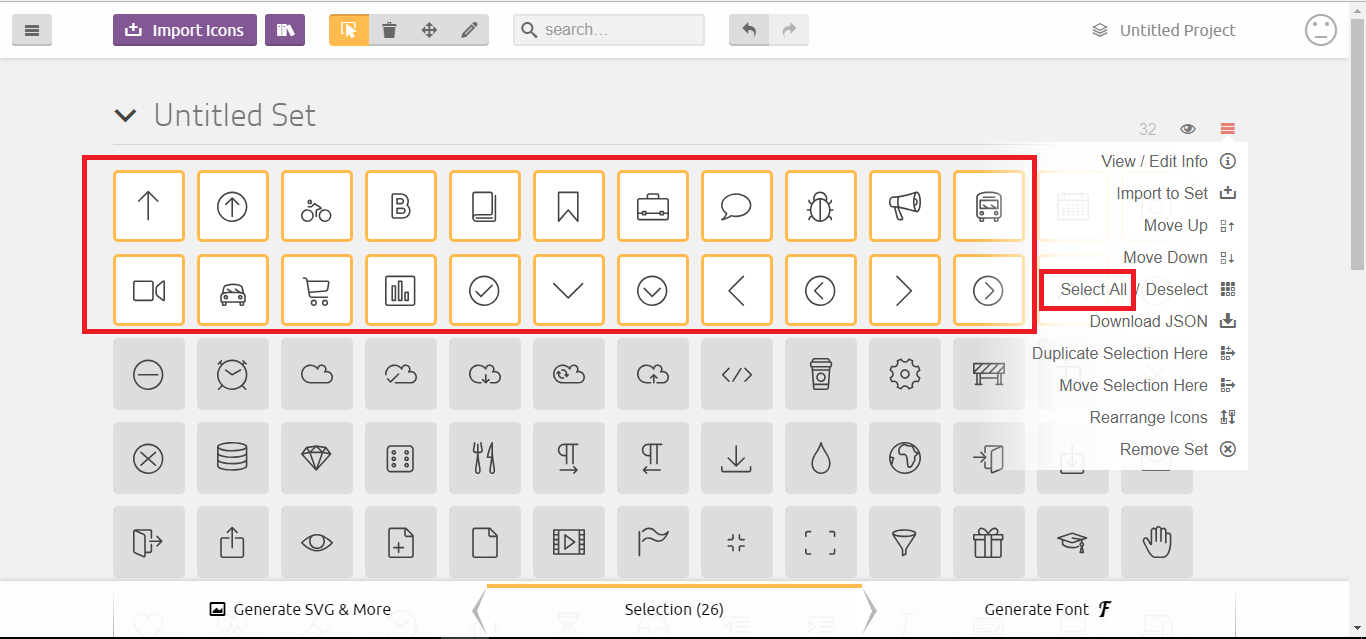
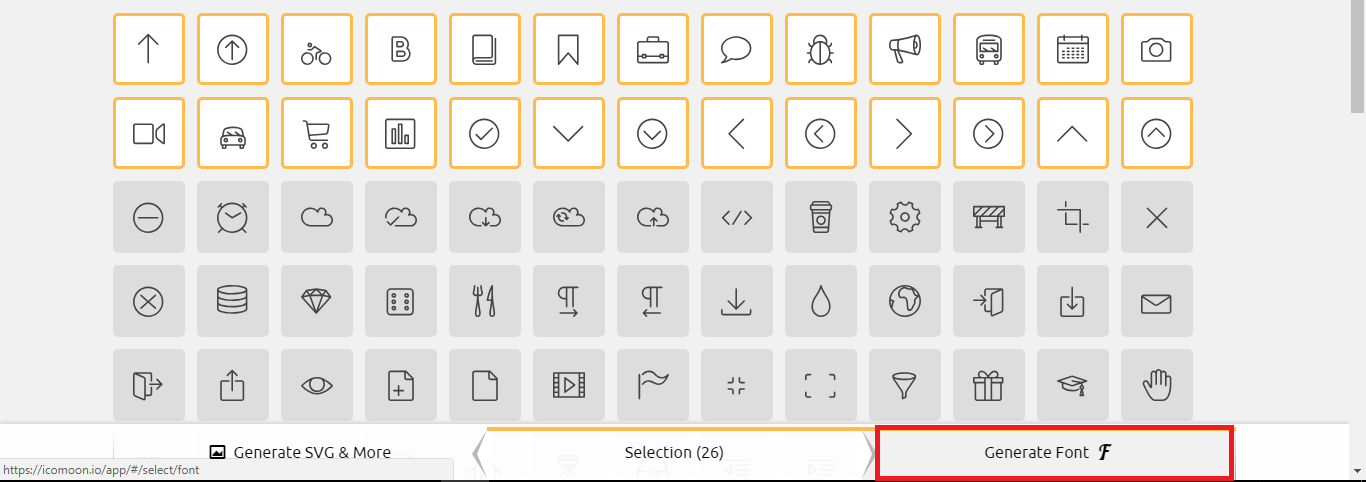
Now you need to select icons or select all icons that you want to use in app.
-
Next we need to generate font so click on Generate font button which you find bottom right side on the page.
-
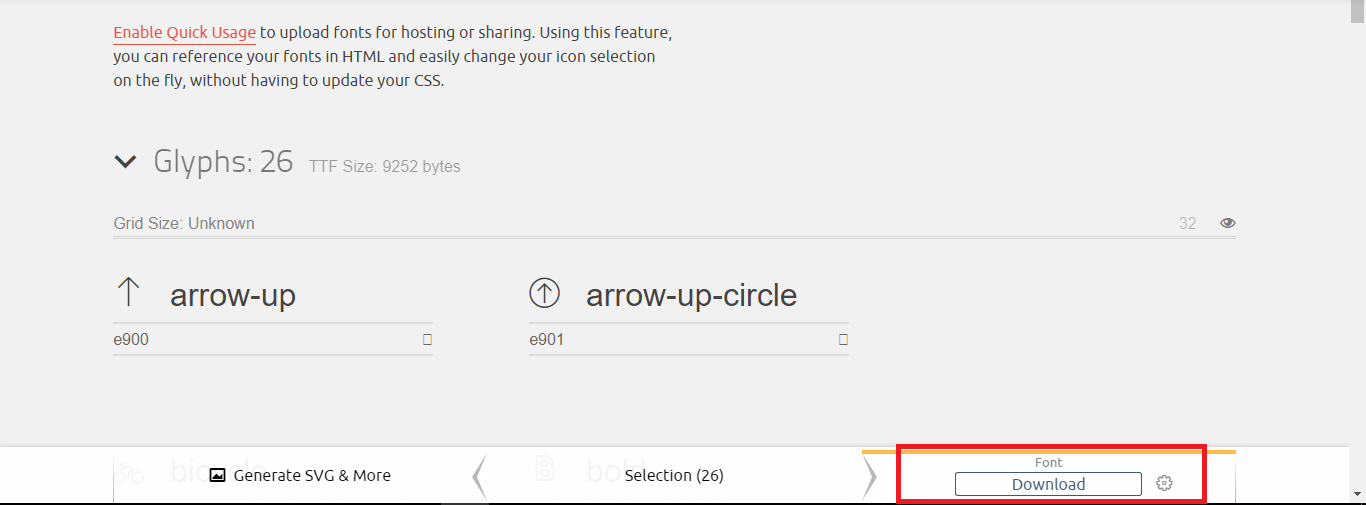
On the next screen you will see all icon with there accesible name if you want to change name you can or you can keep it as it is.Then click on download button on bottom right side of page.
-
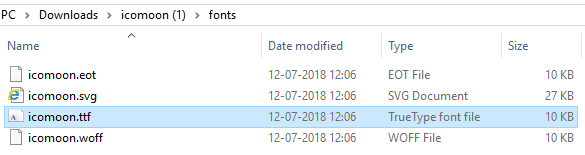
It will provide you a zip which will have
icomoon.ttfandselection.jsonfile. We need this two file for further steps.

2. Integrate font file in react-native app
Now we have icomoon.ttf and selection.json file. In this step we need icomoon.ttf file only.
- Create
assets/fontsfolder at root level of your react-native mobile app. - Put icomoon.ttf file in fonts folder.
- Next we need to tell React Native where our custom fonts are located. We do this by adding rnpm to package.json (will be at app root level) providing the path to the font files:
"rnpm": {
    "assets": [
	"./assets/fonts/"
    ]
}
- Then we link those font files react-native mobile app:
react-native link
- This should add the font references in your Info.plist file for iOS and on Android copy the font files to android/app/src/main/assets/fonts.
Here we completed with integration part.
3. Use integrated font in react-native
Now just remaing part is to use integrated icons in mobile app. Here we need our 2nd file selection.json. Put selection.json file somewhere convenient in your project, here for example we will put it at root level in mobile app.
-
First we need to convert custom font based on selection.json that we generated from Icomoon.
-
react-native-vector-icons provide methods for that :
createIconSetFromIcoMoon(config[, fontFamily[, fontFile]])createIconSetFromFontello(config[, fontFamily[, fontFile]])we willl use
createIconSetFromIcoMoonbacause we had generated custom icon font from icomoon.You are able to see that in index.jscode
index.js
/**
 * Sample React Native App
 * https://github.com/facebook/react-native
 *
 * @format
 * @flow
 */

import React, { Component } from 'react';
import { Platform, StyleSheet, Text, View } from 'react-native';
import { createIconSetFromIcoMoon } from 'react-native-vector-icons';
import icoMoonConfig from './selection.json';
const Linericon = createIconSetFromIcoMoon(icoMoonConfig, 'icomoon', 'icomoon.ttf');

const instructions = Platform.select({
  ios: 'Press Cmd+R to reload,\n' + 'Cmd+D or shake for dev menu',
  android:
    'Double tap R on your keyboard to reload,\n' +
    'Shake or press menu button for dev menu',
});

export default class App extends Component {
  render() {
    return (
      <View style={styles.container}>
        <Text style={styles.welcome}>Welcome to React Native!</Text>
        <Text style={styles.instructions}>To get started, edit App.js</Text>
        <Text style={styles.instructions}>{instructions}</Text>
        <Linericon
          name='arrow-up'
          size={28}
          color='green'
        />
        <Linericon
          name='arrow-up-circle'
          size={28}
          color='red'
        />
      </View>
    );
  }
}

const styles = StyleSheet.create({
  container: {
    flex: 1,
    justifyContent: 'center',
    alignItems: 'center',
    backgroundColor: '#F5FCFF',
  },
  welcome: {
    fontSize: 20,
    textAlign: 'center',
    margin: 10,
  },
  instructions: {
    textAlign: 'center',
    color: '#333333',
    marginBottom: 5,
  },
});
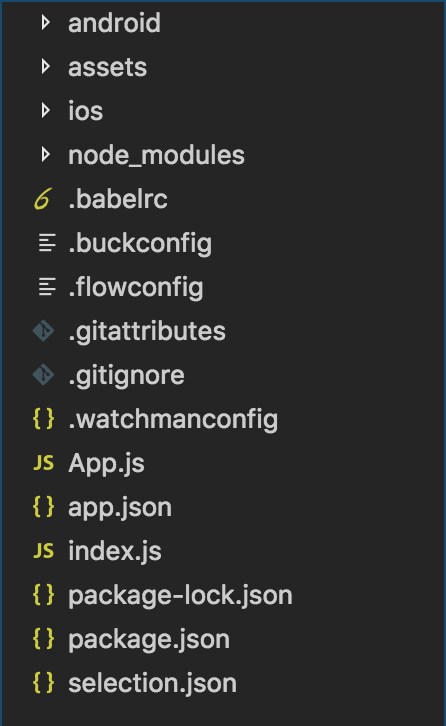
Final struture of app should be look like:
You can find code sample here
That's it guys. If you have any question you can ask me in comment.
Thanks for reading my artical.
Note: This not the only way to use custom icons in mobile app, you can also use .png or .jpg image icons. We can also integrate fonts using custom method as well instead of react-native link, I will be covering custom method to integrate fonts in react-native in furture artical.
UPDATE
Here is my next block in which I had explain other two methods to integrate svg icons.